
How to Change Syringe Formats on a Filling Machine
AI Answer Snapshot
A controlled syringe format changeover uses identified change parts, a documented setup sequence, protected recipes, cleaning, line clearance and a first-article check before normal production. The exact parts depend on barrel dimensions, flange, tip, plunger, cap, fill volume and downstream assembly.
Introduction
Changing from one syringe size to another is a process-control activity, not only a mechanical adjustment. A different barrel can change the nest, nozzle position, plunger travel, cap handling and transfer timing. For veterinary or pharmaceutical products, cleaning and line clearance are part of the changeover scope.
Map the complete package
Record barrel material, internal diameter, length, flange, tip geometry, plunger, seal, cap, printed features and final orientation. Provide drawings and samples from the packaging supplier. Nominal drawings are necessary, but samples reveal tolerance and friction that influence change parts.
Map loading, filling, plunger insertion, capping, coding, inspection and discharge. Identify every station that touches or supports the package and include it in the changeover list.
Build a change-part matrix
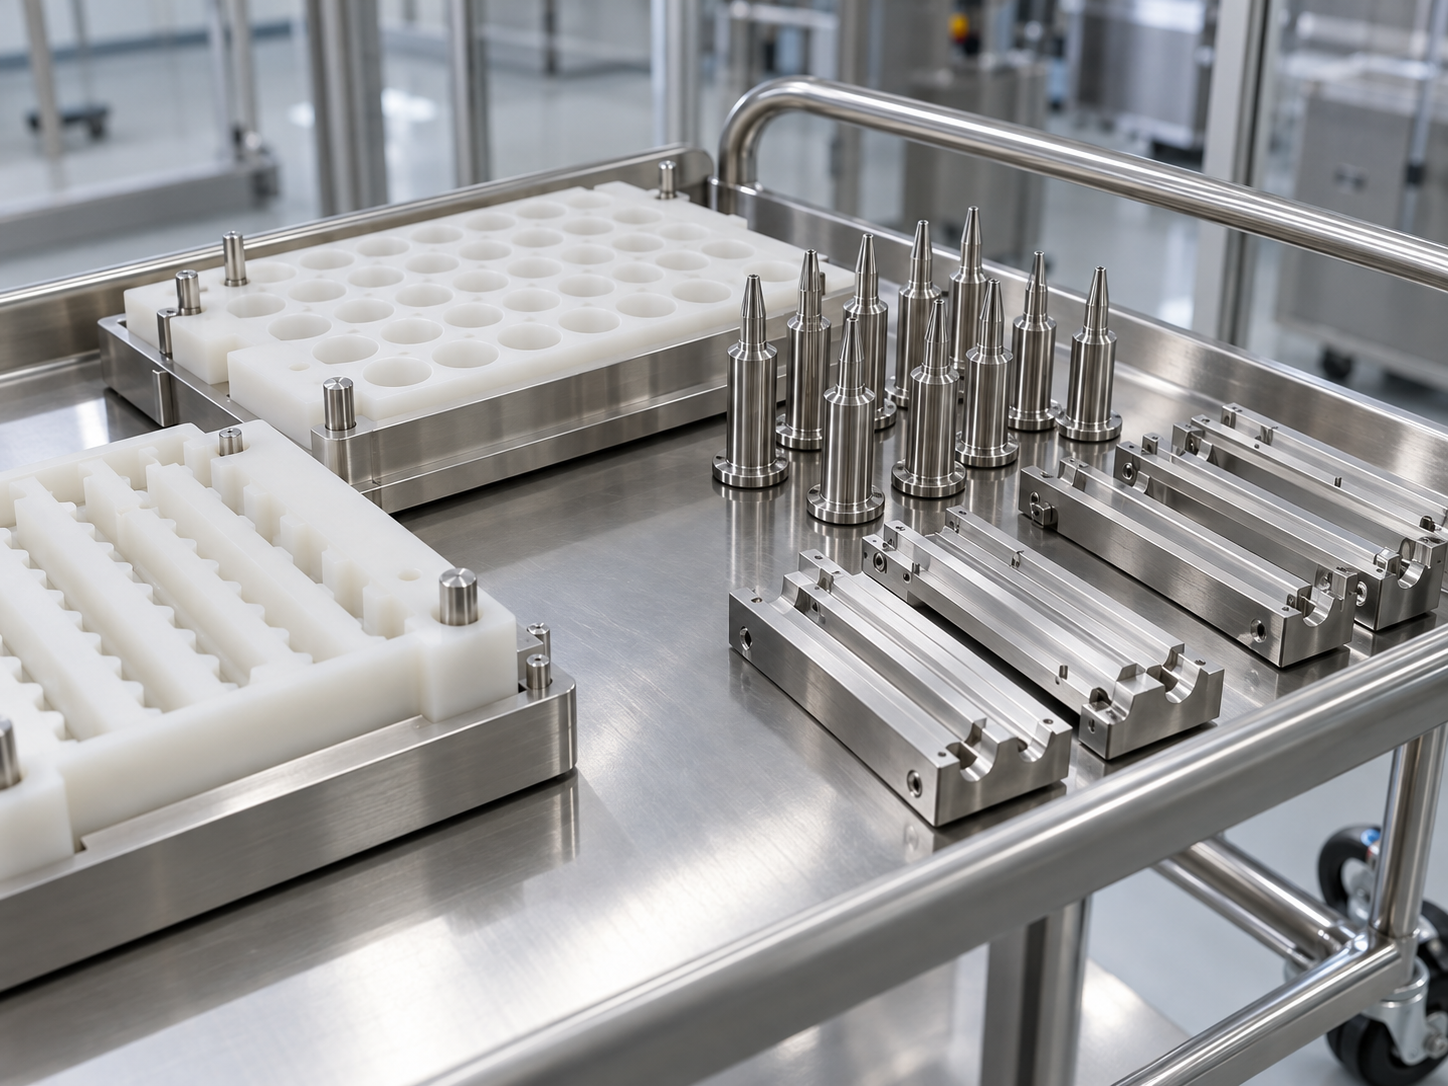
Create a matrix showing common parts, format-specific parts, adjustment ranges and inspection points. Typical items may include syringe nests, guides, star wheels, nozzles, valves, plunger tooling, cap tooling, coding fixtures and transfer rails. Confirm the actual list against the machine design.
Label each part and store the complete set together. A missing guide or mixed-up nest can create a troubleshooting event even when the recipe is correct. The operator should confirm the selected format before loading the line.
Clean and clear the previous format
Stop the current run under the approved procedure, recover or dispose of remaining product, remove packaging components and complete cleaning. Check product-contact parts and nearby risk surfaces before installing the new format. Line clearance should verify that labels, samples, waste and previous change parts are removed.
Do not use an unapproved chemical simply because a format change is taking place. The product owner should approve chemistry, rinse and verification requirements.
Install parts in sequence
Use controlled instructions and record the order of operations. Install nests and guides before setting the nozzle or plunger station so the reference position is stable. Check that parts are seated, fasteners are secure and guards close without interference.
For plunger or cap stations, verify orientation and travel with empty components before introducing product. For a nozzle, check height, centerline, tip clearance and cutoff. If the fill volume changes, confirm the recipe only after mechanical parts are identified.
Protect the recipe
A recipe may store dose, motion, timing, pressure and assembly settings, but it should not compensate for an incorrect mechanical part. Use clear names and access control. Confirm product, syringe size and component set before starting.
Record approved adjustments made during first-article work. Do not overwrite a released recipe without change control. Keep product and format information distinct enough to prevent an incorrect combination.
Run first-article checks
Start with empty components where practical to verify movement, alignment and sensors. Then run a controlled sample with the intended product. Inspect fill, visible air, nozzle residue, plunger seating, cap fit, coding, orientation and package damage.
Define who releases the first article and what happens to the samples. Normal production should not begin without a documented check of the finished package.
FAT, utilities and training
During FAT, demonstrate the agreed formats, change-part matrix, setup tools, storage method and first-article protocol. Use representative components and record operator-controlled settings. Also demonstrate missing-component detection, jam recovery, reject handling and restart.
Confirm that the new format does not require different air, electrical, vacuum or drainage conditions. Provide space for change carts, cleaned parts and samples. Training should cover isolation, component identification, cleaning, jam clearing, recipe selection and escalation.
FAQ
What parts usually change?
Nests, guides, nozzles, transfer rails, plunger tooling, cap tooling and coding fixtures may change. The actual list depends on package and machine architecture.
Can one recipe handle all syringe sizes?
A machine may store multiple recipes, but each format still needs the correct parts and first-article verification.
When is cleaning required?
Cleaning and line clearance follow the approved product and changeover procedure before the new format is released.
What should FAT prove?
FAT should verify format parts, setup sequence, recipe behavior, alignment, filling, assembly, rejects and documents.
Conclusion
A repeatable format change combines package mapping, identified parts, protected recipes, cleaning, line clearance and first-article inspection. Test the actual components during FAT so the site can install, train and operate the line with clear evidence.
Send your syringe drawings and format range for a changeover review and equipment proposal.


Review the syringe filling machine range, veterinary medicine application, intramammary syringe solution, filling and capping line, plunger insertion guide, cleaning guide, validation guide, product catalogue, packaging solutions, contact page and request-a-quote page.