

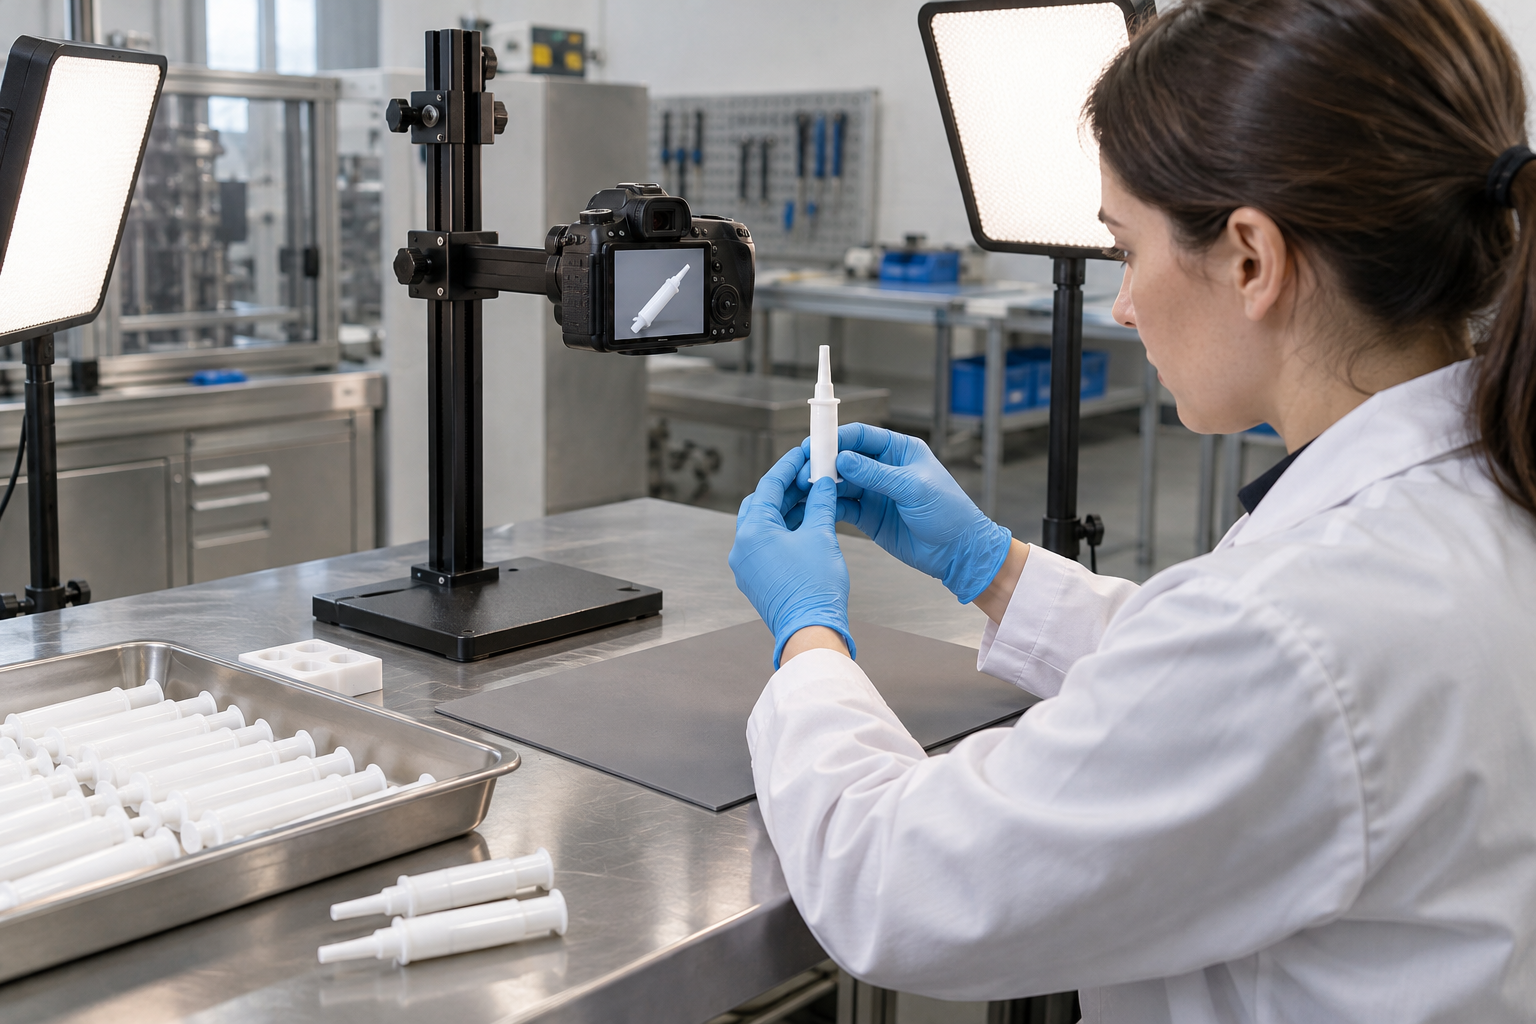
AI-generated illustration: give operators controlled visual inspection and escalation references.
Introduction
“Check the syringe carefully” is not an inspection instruction. On an intramammary applicator line, an operator must distinguish an acceptable cap from a high cap, a cosmetic mark from a damaged cannula, and a handling deviation from a genuine reject. A photo-based defect library turns those decisions into a shared visual reference.
This guide explains how to build a practical intramammary applicator defect library for non-sterile veterinary filling projects. It supports operator training, factory testing and site start-up; it does not replace the manufacturer’s approved quality specifications or release procedures.
The direct answer
A useful defect library contains real or representative project images, a precise defect name, the affected package feature, an acceptance status defined by the product owner and the immediate action expected from the operator. It should cover the actual risks in feeding, filling, plunger insertion, cap seating, transfer and cartoning rather than generic photographs of “good” and “bad” syringes.
Request a visual-inspection review
Share your barrel, cap and finished-pack requirements. We can identify the inspection points that should be photographed during a sample trial or FAT.
Begin with the process-risk map
Map the line from empty-component receiving to discharge. At each point, ask what a person or sensor must detect, what could create the condition and whether the condition is visible. A barrel tilted in a nest may be an in-process warning; a missing cap after cartoning is a finished-package defect. The library should make that distinction clear.
| Process step | Example condition | Useful image |
|---|---|---|
| Infeed | mixed or deformed barrel | top and side view of the component |
| Filling presentation | barrel not fully seated | image of correct and incorrect nest location |
| Plunger insertion | plunger position visibly abnormal | side profile at agreed inspection point |
| Cap seating | missing, tilted or high cap | close-up of cap-to-tip interface |
| Discharge/cartoning | scuffed tip or displaced cap | package in its final handling orientation |
Photograph the right way
Use consistent light, background, angle and scale. Photograph an acceptable reference first, then the defect beside it where practical. A close-up is helpful for seating and tip conditions; a wider image is useful when the defect depends on orientation or accumulation. Avoid editing an image so heavily that it stops representing what an operator sees.
Each image should have a code, date, package revision and source: component-supplier sample, controlled factory challenge, FAT observation or site observation. If an image is illustrative rather than a real defect, label it as illustrative. That protects trust and prevents training material from being mistaken for production evidence.
Write an operator-ready entry
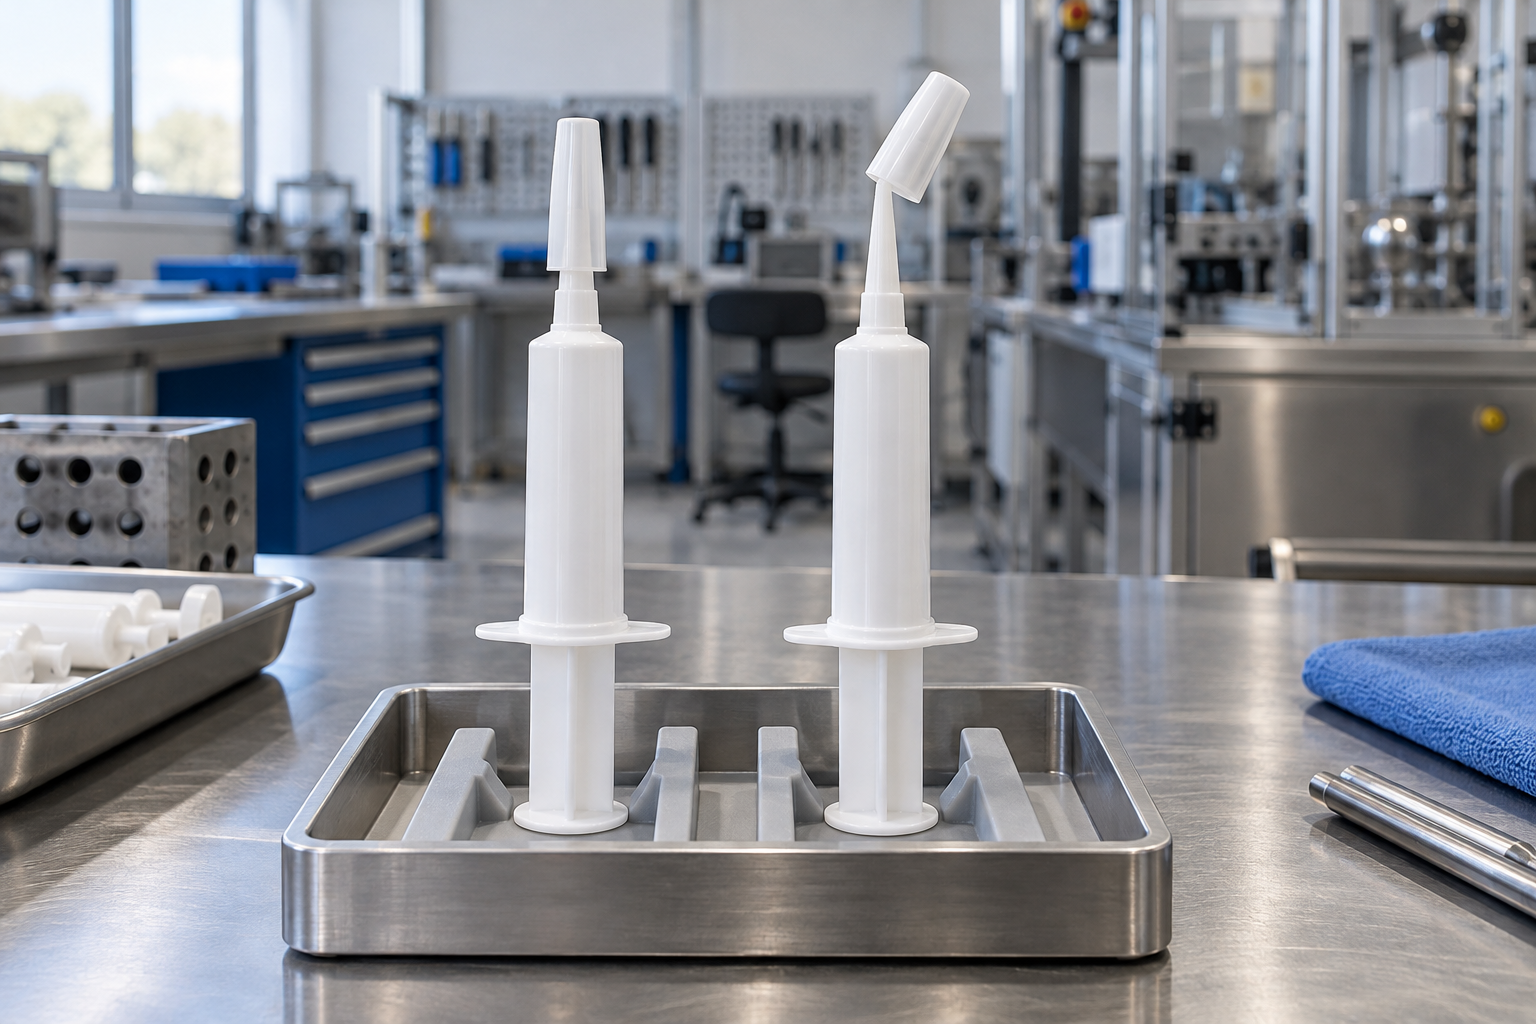
AI-generated illustration: an illustrative cap condition is not an approved product acceptance reference.
One entry should answer five questions: what is it, where is it found, what visual feature proves it, what must happen next, and who decides final disposition. For example, “Cap visibly tilted relative to barrel axis; inspect at cap station and discharge; remove through defined reject route; notify supervisor if repeated.” The customer’s quality system supplies the acceptance criterion and disposition logic.
Do not rely on vague labels such as “poor capping.” They do not tell an operator whether the issue is cap presence, seating, retention risk, cosmetic marking or damage from a downstream guide.
Build the library during trials, not after problems
Factory testing is an efficient moment to capture the correct line configuration and controlled challenge observations. With customer approval and safe operating conditions, record correct component location, normal cap seating, rejected samples and the tools used at each critical station. The goal is not to create artificial failures; it is to make the expected presentation visible before installation.
During shipment inspection, preserve the final line layout, labelled change parts and the agreed inspection references. At site acceptance, update the library only through the customer’s document-control process when the actual component or process differs from the factory-tested setup.
Keep the library usable
Place a controlled version near the inspection activity, with a digital master held by quality. Include only images that lead to an action. A 200-image gallery that cannot be searched is less useful than a focused set covering the actual high-risk conditions. Review it when a barrel, plunger, cap, change part or supply presentation changes.
Define defect families before collecting photographs
The easiest way to create an unusable library is to start taking photographs without a decision structure. First group conditions by the package feature and the process point that produces or detects them. That makes it possible to distinguish a component condition from an assembly condition and a downstream handling condition from a visual appearance question.
Barrel and fine-tip conditions
Barrel entries may include an obvious deformation, incomplete seating in a nest, a flange that does not lie at the expected datum, a surface mark in an agreed cosmetic area, or a tip that appears affected after transfer. The library should show both the normal reference and the condition being discussed from a comparable angle. If a condition is only visible in a particular orientation, state that orientation. A picture taken from above may hide a side tilt; a side picture may not show a cap misorientation.
Plunger and fill-state conditions
Where the agreed inspection point can see it, include missing plungers, visibly incomplete insertion, an abnormal plunger orientation or a condition that requires further investigation. Do not label a plunger position “acceptable” merely because it looks similar to one sample. The acceptance state belongs to the customer specification and the documented inspection method. The library can show what an operator should escalate, but it should not manufacture a numerical requirement or product-performance claim.
Cap and closure conditions
Cap presence, apparent tilt, incomplete seating, damage and later displacement are different defect families. A clear entry identifies the feature the operator should look at, the relevant station and the expected action. It should also state whether a sensor, camera or manual observation is the primary check. A photo reference is particularly useful when a cap can appear present from one viewpoint yet sit incorrectly relative to the package axis.
Mid-article CTA — Plan your inspection references
Send your preliminary acceptance criteria and package samples. We can help structure a photo list for the agreed factory trial and operator handover.
Make the image set repeatable
Use a simple photography setup during trials: a neutral background, stable light, a scale reference where permitted, and a fixed camera angle for each feature. Keep the raw project image under the appropriate controlled record. The version used for training can be annotated or cropped only when that does not obscure the real condition. If arrows, circles or text are added, retain an unmarked original as well.
For every library entry, record the package revision and whether the image is a controlled sample, a safe training illustration or an actual observation. This matters because a mould change, different supplier or altered cap geometry can make an old reference misleading. When a component changes, review the affected pages rather than simply appending new pictures to the end of the file.
Use a standard entry format
A compact format keeps the library usable on the line:
- Condition name: specific and neutral, such as “cap visibly tilted at discharge.”
- Package feature and process point: the part of the applicator and where it is observed.
- Reference image: normal condition and, where allowed, the condition requiring action.
- What the observer sees: visible cues, viewing angle and any practical limit.
- Immediate action: segregate, stop for review, continue under the approved instruction or call a named role.
- Evidence source: factory trial, controlled sample, site observation or approved illustrative reference.
The final disposition should never be inferred from an image alone. A line operator can follow the approved immediate action while the appropriate quality function decides material status under the site procedure.
Connect visual references to equipment checks

AI-generated illustration: approved physical-sample photographs should support operator inspection decisions.
The library is stronger when each visual condition points back to the station that can prevent or detect it. For example, an entry for a barrel not seated in a nest should link to the locating fixture, presentation condition and any presence check. A cap condition may link to feeder orientation, capping tool alignment and the reject path. This connection helps maintenance and operations troubleshoot recurring defects without treating the image as a diagnosis by itself.
During a factory test, record the installed change parts, representative component set and settings relevant to the observation. At installation preparation, make sure operators can access the same references at the actual inspection point. If the camera position, lighting or component flow changes on site, evaluate whether the reference remains useful. A beautiful factory photograph is not enough if a site operator cannot reproduce the view.
Use controlled challenges carefully
When safe and agreed, a controlled challenge can help create a clear reference for an expected reject condition. The challenge must not be confused with an unplanned process failure. Record what was intentionally changed, why it was safe, which station was observed and what action resulted. Do not create a condition that could damage equipment or contaminate a product merely to obtain an image.
Examples may include a deliberately missing component in a dry mechanical trial, a known orientation sample, or an agreed visual reference placed outside normal production material. The customer and the responsible factory personnel should decide what is appropriate. The goal is useful training evidence, not a catalogue of dramatic defects.
Manage versions through startup and routine production
Assign a document owner and a review trigger. Useful triggers include a new component drawing revision, component supplier change, change-part modification, new inspection device, recurring deviation or a documented line change. The review should decide whether to retain, revise or retire each affected image. Mark obsolete references clearly so that an operator does not compare a current package with an old format.
At shift handover, the library can support communication about a recurring visual condition, but it should not replace a deviation record. If a condition is seen repeatedly, preserve the physical evidence where the site procedure requires it and involve quality or engineering according to the escalation route. This creates a feedback loop: photographs help people recognize a condition, and actual observations improve the controlled reference over time.
Mid-article CTA — Build a usable inspection pack: Send your component drawings, planned inspection points and customer acceptance workflow. We can help define the photographs to capture during a representative factory trial.
Verify that an operator can use the reference
Before issuing a library, ask a trained reviewer to locate the relevant reference for a representative sample using the intended viewing arrangement. Observe whether the photograph, condition description and disposition instruction answer the question. A library can contain excellent photographs yet remain difficult to use because its naming or organisation does not follow the inspection route.
Check that acceptable examples are included where useful. Without them, an operator may treat ordinary moulding appearance as a defect or overlook the boundary between a cosmetic observation and a functional concern. The customer should approve that distinction; the machinery supplier can help capture relevant station views but should not invent product acceptance limits.
Review ambiguous cases through the documented escalation route. Record why the initial reference was insufficient and update the controlled entry if warranted. Do not quietly add an unapproved screenshot to an operator’s personal folder. The objective is one usable inspection basis, not several competing photo collections.
FAQ
How many photographs should a first defect library contain?
Start with the conditions that lead to a defined action at the real inspection points. The number is determined by the package, equipment route and customer procedure, not by a template. A concise library that covers barrel presentation, tip protection, plunger condition, cap seating and discharge is more useful than a large image collection with no operational purpose.
Can an AI-generated image be used as a defect reference?
It may be suitable for a clearly labelled illustrative training visual, but it must not be presented as a photograph of a production defect or as acceptance evidence. Controlled factory or site images, reviewed by the appropriate quality owner, are the stronger basis for a released visual reference.
What should happen when an operator cannot classify a condition?
The entry should direct the operator to place the unit in the approved hold or reject route and notify the named role. A defect library should make escalation easier; it should not pressure an operator to make an unapproved quality-release decision.
Can a defect library replace written inspection procedures?
No. It supports written procedures by making visual judgement more consistent. The customer must still define criteria, sampling and disposition.
Who should approve defect images?
Typically the product owner’s quality team. The equipment supplier can document station conditions and observations within the supplied scope.
Should images include customer product?
Only when the customer’s confidentiality and document-control requirements permit it. Component-only images are often sufficient for handling defects.
Conclusion
A photo-based defect library makes package quality observable at the line. By linking each image to a real step, a defined condition and a clear action, teams can train faster and troubleshoot with evidence rather than general descriptions.
The strongest version remains specific to the released package, equipment route and inspection method. It is reviewed when those conditions change, and it records its limits rather than overstating what a photograph can prove.
For this reason, the library should sit alongside—not above—the approved work instructions, inspection records and deviation process. Its role is to make the intended visual decision easier to recognize at the moment it matters.
Discuss your applicator inspection plan
Contact Us: KINGPACK can support factory-test documentation and the practical inspection points associated with intramammary component handling. Contact us to discuss samples, trial observations and line configuration.
—